Get instant support with our search!
Adding domains to safe senders list - O365 / Intune

Users may receive phishing emails that display an 'Unverified' warning next to the sender's name or email address, as shown below:
To resolve this, you can add the domain(s) to the Safe Senders List.
Configuring Office 365/Intune Settings
Below are two options for configuring safe sender settings:
Option 1: Configure via Microsoft Endpoint Manager
- Go to the Microsoft Endpoint Manager Admin Center: https://endpoint.microsoft.com
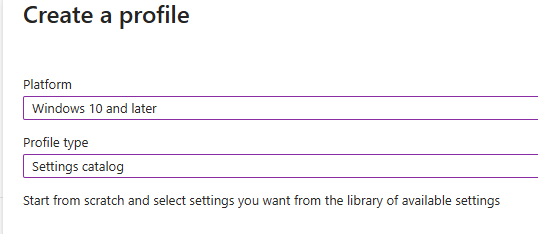
- Create a new Settings Catalog policy for Windows devices.
- Platform: Windows 10 and later
- Configure Outlook Settings:
- Search for:
Junk E-mail Protection - Enable: Enable Junk E-mail Protection
- Search for:
- Search for Safe Senders in the Outlook configuration options and enable the following settings:
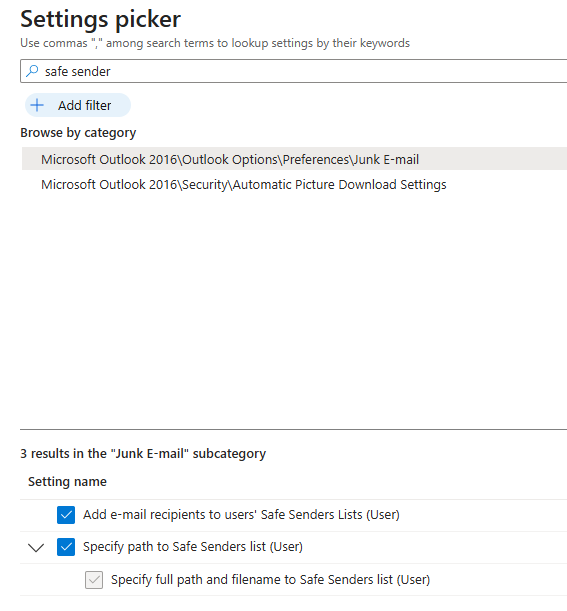
- Specify path to Safe Senders list (User)
- Specify full path and filename to Safe Senders list (User)
- Add email recipients to users’ Safe Senders Lists (User)
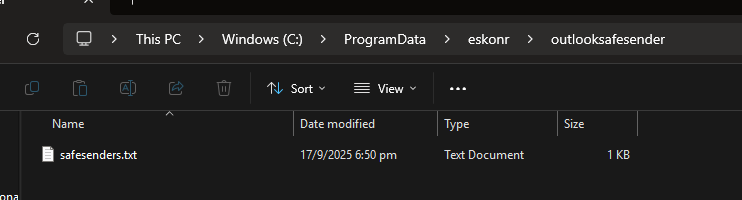
- Set the policy to Enabled, and provide the path to your txt file (e.g.
C:\ProgramData\eskonr\outlooksafesender\safesenders.txt).
Option 2: Deploy Registry Settings via PowerShell Script
Sample Registry Path:
PowerShell
Set-ItemProperty -Path "HKCU:\Software\Microsoft\Office\16.0\Outlook\Options\Mail" `
-Name "SafeSendersList" -Value "newsletter@trustedsource.com;@yourdomain.com"
Steps
- Create a PowerShell script with your Safe Senders list.
- In Intune, go to Devices → Scripts → Add.
- Upload the script and assign it to your target group.